
Classic Setup Flow
This documentation is still being edited and may differ from the actual version.
This page starts from connecting the router. It assumes OpenWrt is already installed and Flet’H has been installed through LuCI installation or command-line installation.
The typical wiring looks like this:
Internet / NTT NGN | | fiber v ONU | | Ethernet cable vOpenWrt router WAN port -> wan / wan6OpenWrt router LAN port -> PC, phone, switch, Wi-FiFlet’H cares about OpenWrt wan6. Once wan6 can obtain an IPv6 address or prefix from upstream, you can configure DS-Lite, MAP-E, or static IP.
1. Connect the cables
Section titled “1. Connect the cables”Wire the router like a normal home router:
- Connect the LAN port of the ONU to the WAN port of the OpenWrt router.
- Connect your computer to an OpenWrt LAN port, or connect to the OpenWrt Wi-Fi.
- Power on the ONU and router, then wait for the link to stabilize.
If you are using an ONU, make sure IPv6 is not disabled there. Flet’H needs OpenWrt to receive an IPv6 address or prefix.
2. Log in to LuCI
Section titled “2. Log in to LuCI”Open the LuCI web interface in your browser. The common default address is:
http://192.168.1.1/If it does not open, confirm that your computer is on the OpenWrt LAN side or check the management address you configured.
3. Make wan6 obtain IPv6 first
Section titled “3. Make wan6 obtain IPv6 first”If wan6 has not been prepared yet, go back to Before Install: Get OpenWrt Online first.
Open Network -> Flet'H -> ツール, then under LAN IPv6 設定, click SLAAC (/64) or PD (/56) depending on your line to apply IPv6 設定 to the LAN side. Otherwise the router itself may have IPv6, but LAN clients may still have no network. If you prefer manual setup, see LAN IPv6 Basics.
If the wan6 Client ID has not been repaired yet, select wan6 lower on the same page and click 修正.
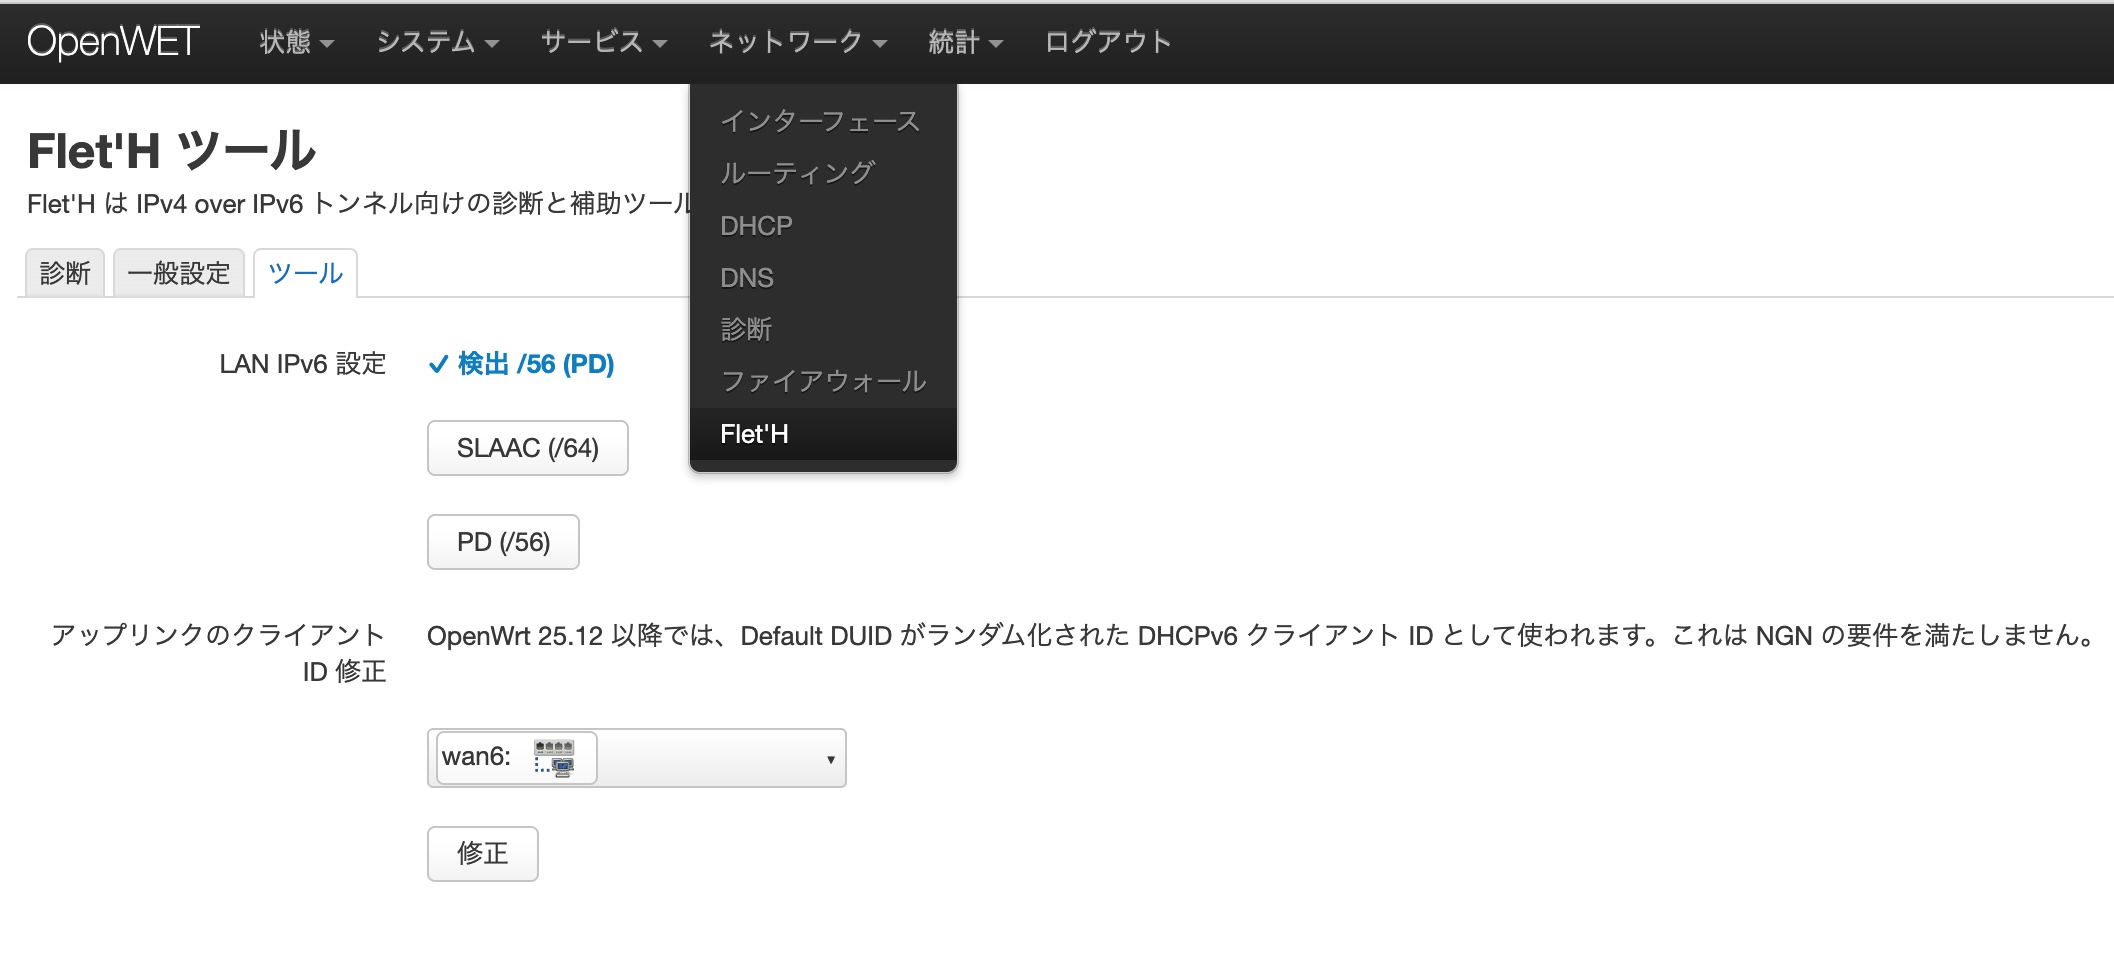
Then confirm the result in:
Network -> InterfacesCompletion check: wan6 status shows IPv6 address. On DHCPv6-PD lines, it should also show IPv6 PD.
At this stage, OpenWrt does not need working IPv4 internet yet.
4. Change wan to the Flet’H interface
Section titled “4. Change wan to the Flet’H interface”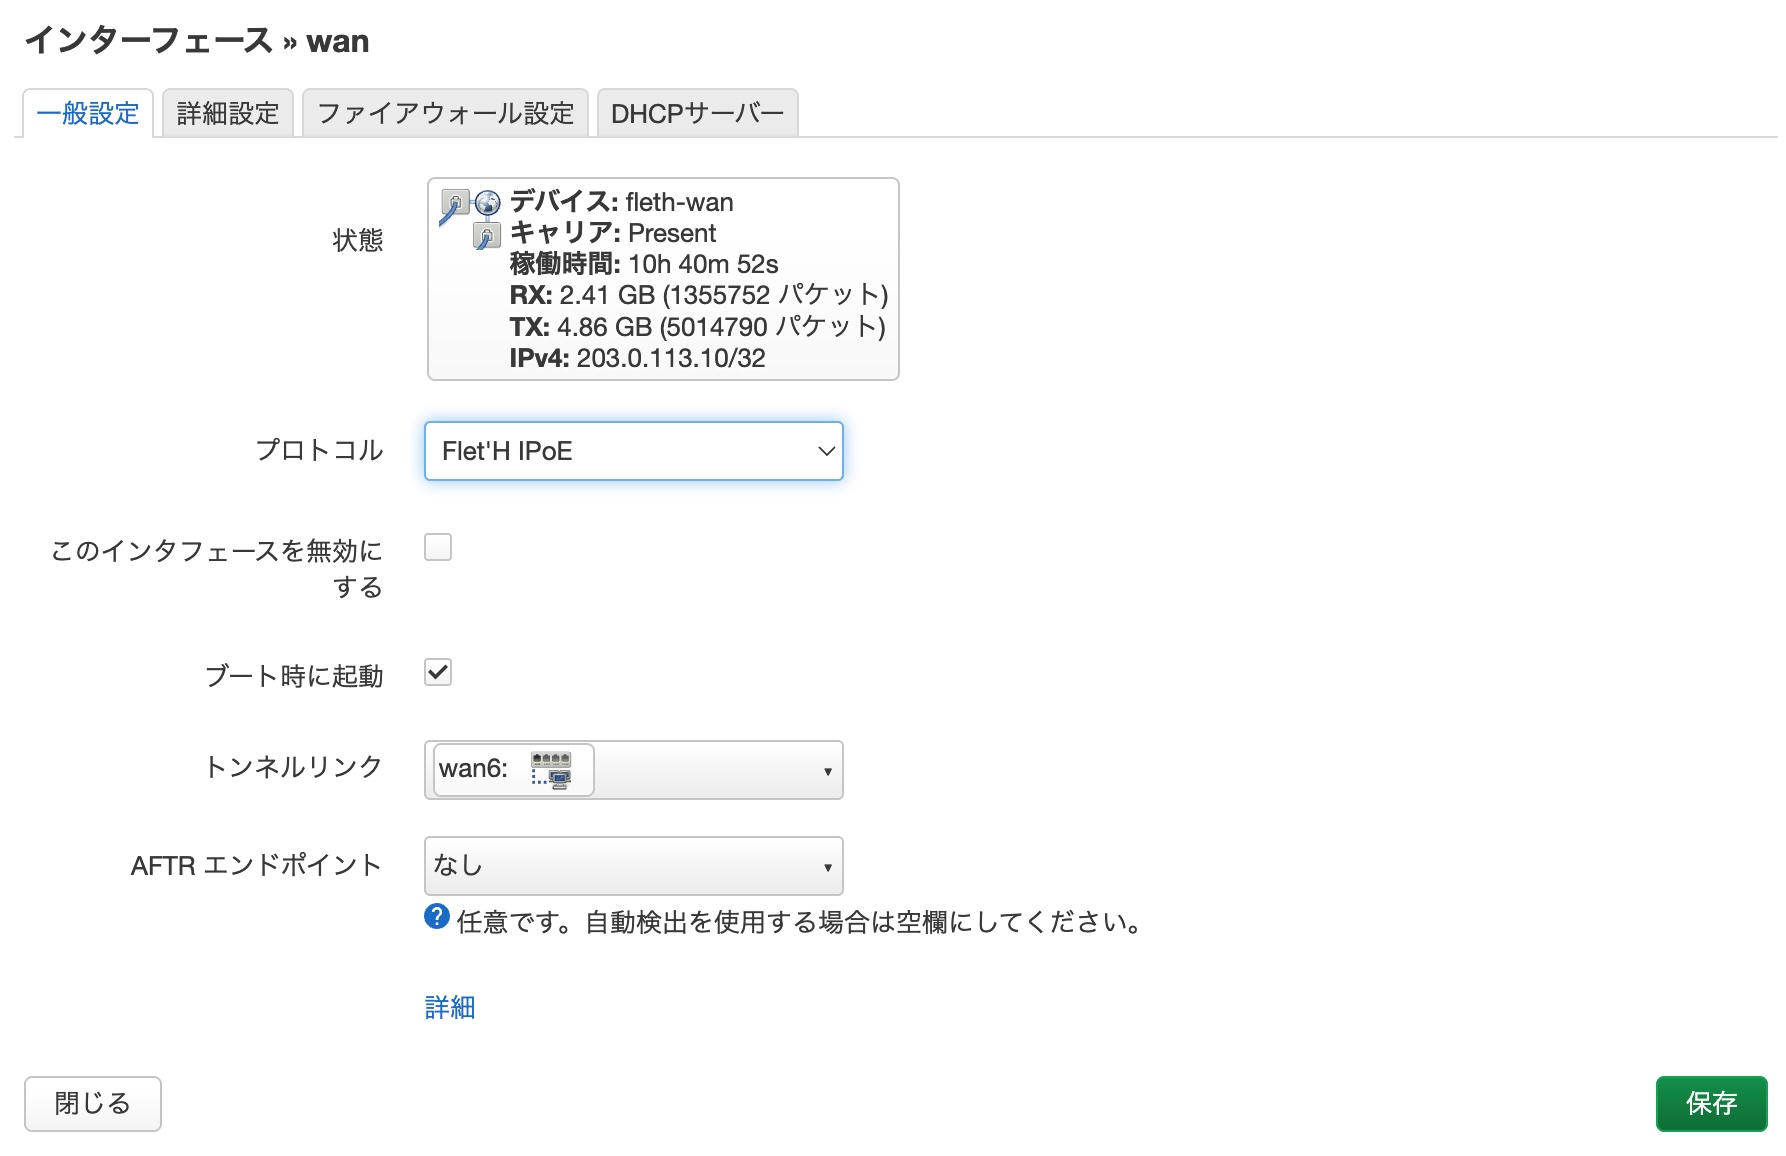
Open Network -> Interfaces, edit the existing wan interface, then set it as shown:
プロトコル:Flet'H IPoEトンネルリンク:wan6ファイアウォール設定: assign it to thewanzone
Save and apply.
This applies only to
Flet'H IPoE: do not copy this firewall-zone setting to aFlet'H Static IP(IPIP6H) interface. TheIPIP6Hinterface must have no firewall zone assigned. In particular, never place it in thewanzone, because the resulting firewall rules conflict with the IPIP6H traffic path and prevent communication. Static IP users should continue with Classic Setup Flow (Static IP).
5. Static IP users
Section titled “5. Static IP users”If your plan includes static IPv4 or independent IPv4, do not assume it must replace ordinary Flet'H IPoE. The static address can be owned by OpenWrt, or used only by a DMZ-side device while ordinary LAN clients continue using MAP-E / DS-Lite.
See Classic Setup Flow (Static IP) for the full setup.
6. Static IP passthrough
Section titled “6. Static IP passthrough”Static IP passthrough is the special Flet’H case: OpenWrt brings up the IPv6 / IPIP6 tunnel, but the public IPv4 address is used by a DMZ-side firewall, business router, or server. Ordinary LAN clients can still keep using Flet'H IPoE.
See Classic Setup Flow (Static IP) for wiring and field details.
7. Using with Hikari Denwa
Section titled “7. Using with Hikari Denwa”If you want to use a VoIP router like the Yamaha NVR500/510 for Hikari Denwa while OpenWrt handles the internet connection, you will need a bridge configuration for the WAN side.
See Classic Setup Flow (with Hikari Denwa) for details.
8. Check detection results
Section titled “8. Check detection results”Open:
Network -> Flet'HCheck the detected area, prefix, DS-Lite / MAP-E provider, and port ranges.
If the page is empty or detection fails, see Troubleshooting.